Showing posts with label html5. Show all posts

Tuesday, July 3, 2012

Step 7a - The Comments Object

I haven't posted anything for awhile since I had a crazy/fun work project going on. I learned four new tools/technologies: RabbitMQ, HTML5 drag and drop file uploading, Phil Sturgeon's CodeIgniter REST libraries and PostGreSQL. It was fun, but limited my time for the Go Reader :-(  But since it's winding down, I've got more free time to devote to finishing this up. 

Go Comments

Every stone in Go means something. Sometimes the difference of a single line can have a completely contrary meaning. If black plays on the third line, she may want to create a safe group. On the fourth line she may be testing the waters and be prepared to run.

As a beginner, I find it difficult interpreting the meaning of each play. Fortunately, there are a lot of games out there professionals and strong amateurs have commented on. For this post I'll talk about displaying these comments.

Programmatically, the challenge in displaying the comments is:
  • The commented area shouldn't be covered, so the user can see the comments and the stones referred to at the same time
  • The commented stone can appear just about anywhere on the board, so the comment must position itself in different places, so as to not overlap the stone
  • It's easy to figure out a single stone mentioned in the comment, but hard to know what other stones are involved. So there is a danger of accidentally overlapping stones you want the user to see
Some ways of addressing these problems are to:
  • Have semi-transparent comment balloons, so stones are visible underneath the comment
  • Allow the user to close the comment balloon after reading it
Since there is only one comment at a time, my first attempt was to display it on a single canvas on top of the other ones. I thought this would work well because HTML5 canvases are transparent. After my first test, I realized this approach wasn't going to work, though. It came out looking like this:


( The left side is the comment object. ) I found out that when you draw text into the canvas object it doesn't wrap the words :-(

So there seemed to be three obvious solutions:
  • Add in line breaks into my stored comments and perform a carriage return in my code when I detect those
  • Use a JavaScript function to automatically calculate line breaks
  • Give up the idea of a canvas and use a div instead, which has the word-wrap built in
The last one seemed like the simplest solution. Since there's already a wheel out there, re-invent it? Although it would have been more interesting to use a canvas, it seemed the wrong tool for the job. Besides, it'd be good to work on my paltry CSS skills for a bit.

Drawing the Bubble

The comment bubble ended up being just a plain div, with the following CSS style:

#comment_div {
    color: black;
    background-color:#FCF6CF;
    opacity: 0.5;
    border-radius: 20px;
    border-color: black;
    border-width: 2px;
    border-style: solid;
    padding: 20px;
    z-index:1000;
    overflow:hidden;
}

The text color is black. The opacity is 50%. I gave it some curved corners with the border-radius attribute. The padding ensures the text doesn't go right up to the edge, and the z-index field ensures the div floats on top of everything else.

One difficult decision was the choice of overflow:hidden vs overflow:auto. If I had set the div's style to overflow:auto, it would have scrolled the content. with overflow:hidden it just chops the text off at the end of the div. I was worried that on a touch interface the overflow:auto would be difficult to manage. Maybe a control that expands the comment ballon to full screen if there is overflow will be good for the future. 

Not Obscuring Stones

In order to avoid obscuring any important stones on the board, I employed three methods:
  1. As I mentioned above the comment bubble is semi-transparent
  2. I position the bubble away from the main stone mentioned
  3. If the user clicks/touches the bubble it disappears
For #2 it took awhile for me to realize just a simple algorithm will work to position the bubble. For the display method, all I need to do is send it the position of a stone that is being referenced in the comment. Then I calculate the quadrant that stone is in, and put the comment bubble in the opposite quadrant.

For example, if the mentioned stone is in the top, right then the comment bubble is placed in the bottom, left. This seems to work fine.

Here is the code for the "algorithm" :-)


 display: (stoneX, stoneY ) ->

  #figure out the quadrant of the referenced stone
  widthLoc = if stoneX < 10 then 'left' else 'right'
  heightLoc = if stoneY < 10 then 'top' else 'bottom'

  #position the comment in the diagonally-opposed quadrant
  x = if widthLoc is 'left' then @quadrantWidth else 0
  y = if heightLoc is 'top' then @quadrantWidth else 0
  
  #move the div to the correct position over the board
  position = $('#goBoardImage').offset()
  position.left = position.left + x
  position.top = position.top + y
  $('#comment_div').css(position)
  $('#comment_div').show()

I know I could have reduced the "algorithm" from 4 lines down to 2. However, it's not really a computation-heavy area of the code. And I like it, if I can just walk up to it later and figure out what it's doing at a glance.

Here's What it Looks Like
I figured I could use the first comment bubble to provide initial instructions:

And here's the comment bubble automatically positioning itself in a the quadrant diagonally-opposite from the first stone played:


What's Next

Since I'm already in tl;dr - territory with this post I'll finish off the comment object in the next post. I'll put in how I modified the JavaScript SGF parser to pull out the comments and added in a pointer from the comment to the mentioned stone.

Sunday, January 29, 2012

Step 6 - The Stone Image

A Better-Looking Stone

There are a lot of enjoyable experiences in playing Go on a real board. There is the polished, wooden pine board.  There's the feel of the stones and the small 'click' they make as they are played. The stones drawn in the previous posts were just flat disks that didn't recreate the image of a real go board. In order to make the stones a bit more evocative of a real Go board, let's add a highlight and shadowing to make them more three-dimensional.

One of the great things about the HTML5 Canvas element is its flexibility. If you can imagine an image, there must be a way to draw it. One perfect effect for creating a 3-D stone is the radial gradient effect that can create a realistic highlight for the stone.

To use a radial gradient with jCanvas you just create a gradient color and draw objects with it. It's kind of like creating a gradient color and adding it to your palette. So instead of drawing a stone with black or white, you draw it with your custom-made radial gradient color.

The radial gradient is built by assuming there are two circles of different colors and the gradient flows between them. The x1,y1 and x2,y2 are the center points of the two circles. The r1 and r2 values are the radii of the circles. C1 is the color of the first circle and c2 is the color that it gradually flows into.

After playing with the values for awhile, I placed the center points of the circles to the upper-left of the center point of the main circle. I started with a small radius of 2 for the smaller circle and made the second circle match the full radius.
// set the begin and end colors for black
var beginColor = "#4C4646";
var endColor = "#000000";

// figure out the color of the piece
if(theMove.charAt(1)== "W")
{
 // begin and end colors for white
 var beginColor = "#ffffff";
 var endColor = "#DDDDDD";

}

// calculate the radius so it is half of the line spacing minus one pixel so stones aren't on top of each other
var theRadius = (this.lineSpacing / 2) - 1;

var radial = $("canvas").gradient({
          x1: theConvertedValue.x-(theRadius/2), y1: theConvertedValue.y-(theRadius/2),
          x2: theConvertedValue.x-(theRadius/2), y2: theConvertedValue.y-(theRadius/2),
          r1: 2, r2: theRadius,
          c1: beginColor,
          c2: endColor
          });


After looking at the white piece, it looked really plastic-like. So to change this, I added a shadow blur around the edge of the piece. This was accomplished by adding the following attributes when the stone was drawn:
   shadowColor: "#000",
   shadowBlur: 2,


It looked better, but still not quite realistic. So finally I added just a subtle drop shadow on the lower-right side:
shadowX: 1, shadowY: 1,


So the final drawing routine was just:
// use jCanvas to draw the piece
$("canvas").drawArc({
   fillStyle: radial,
   shadowColor: "#000",
   shadowBlur: 2,
   shadowX: 1, shadowY: 1,
   strokeWidth: 1,
   x: theConvertedValue.x, y: theConvertedValue.y,
   radius: theRadius
 });
}


And so now the new stones look like this!:


Saturday, January 21, 2012

Step 5 - The New and Improved Board Object!

The first step in implementing the UML diagram is to create the board object.

The main changes I made to the board-drawing code were:
  1. Encapsulating the code inside a JavaScript object
  2. Removing the code for drawing the wood grain on the canvas
  3. Modifying the code so it would support multiple screen widths
The first step was pretty easy. Just like the game object, all it took was to define the object and then instantiate it in the code. In the constructor, I pass in the padding (in pixels) around the board, the width (in pixels) of the board, and the number of lines. Although currently it only supports 19 x 19 line boards.

The constructor looks like this:

// the code that draws the board encapsulated as an object
function Board( padding, width, lines )
{
	this.padding = padding; // padding around the board
	this.width = width;	// width of the actual playing area
	this.lines = lines;	// number of lines on the board 
	this.lineSpacing = (this.width)/(this.lines -1 ); // the spacing between the lines
	this.starPoints = [";S[dd]",";S[jd]",";S[pd]",";S[dj]",";S[jj]",";S[pj]",";S[dp]",";S[jp]",";S[pp]"]; //star points for a 19 x 19 board in SGF format

with the rest of the object being the methods drawBoardLines( ), sgfToXy( ), and drawPiece( ). The sgfToXy( ) and drawPiece( ) are going to disappear when I define the Stone object. Right now it's not 100% matching the UML diagram, but we're getting there :-)

Initially, when I created the board object, the callback wasn't working to start drawing the board lines. Since I'm just learning JavaScript I figured it had something to do with the way I was defining it as this.drawBoardLines( ). I planned to change the design so the board and stones were on separate canvases on top of the board image. Since the callback wasn't working, I thought it would be better to invest my time learning how to layer canvas elements than getting the callback working.

Since the canvas is transparent, this part just required some simple jQuery and CSS to position the canvas on top of an image of the board. It just took some googling and experimentation to figure it out. In go.js the new code looks like this:

// wait until the page is loaded to size and draw the board
$(document).ready(function()
{
	var thePadding = 10;
	var theLines = 19;
	
	// calculate the size of the board
	var boardWidth = Math.round($('#gameSelectBtn').width());
				  
	// after we know the width of the board we can instantiate a board object
	theBoard = new Board(thePadding, boardWidth, theLines);
	
	// next we set the image and board lines to the same value
	$('#goBoardImage').width(boardWidth +    (thePadding * 2));
	$('#goBoardImage').height(boardWidth +   (thePadding * 2));

	// NOTE: need to set width and height with .attr because $('#goBoard').width() will stretch the image and not 
	// change the actual size of the canvas
	$('#goBoard').attr("width", boardWidth + (thePadding * 2));    
	$('#goBoard').attr("height", boardWidth+ (thePadding * 2));
				  
	// thank you stackoverflow.com for the code to position the canvas over the top of the image of the board !!
	// http://stackoverflow.com/questions/683339/how-do-i-find-the-absolute-position-of-an-element-using-jquery
	var position = $('#goBoardImage').offset();
	$('#goBoard').css(position);
				  
    // finally, draw out the lines on the board
	theBoard.drawBoardLines();
});

Lines 33 and 34 position the canvas over the image. And Lines 22-29 resize the board after the page has loaded. One interesting thing is that if you use the .width() and .height() jQuery functions it will stretch the canvas instead of resizing it. So if the canvas originally started out as 100 x 100 pixels and you set the width x height to 400 x 400, you would still have a 100 x 100 canvas, but it would be displayed four times the original size!

The last step was to remove all of the hard-coded values in the original board code. Hard-coding values is a really bad practice, obviously. However, I like to code by making lots of small, fast refactorings, instead of a lengthy, massive push to get it all working perfectly right away.

All of the hardcoded values can be calculated from the three parameters initially passed in. The slightly tricky part was dynamically resizing the board based on the initial screen width. Eventually the board will be a property of the Player object. For now I created a global variable to hold the board object, but I couldn't instantiate it until after the page was loaded because I needed to know the page width. So I created the variable theBoard and assigned it 'null'.  Then later I assigned the instantiated board object, once I knew the page width:

var theBoard = null; // need this as a global variable but can't instantiate until after the page is loaded
...
// after we know the width of the board we can instantiate a board object
theBoard = new Board(thePadding, boardWidth, theLines);

The final change was a small improvement in the routine drawing the star points. The routine I had would work for a 19 x 19 board. If the board size changed in the future, the number and position of the star points would change. Since I had to re-write this method anyway to get rid of the hard-coded variables, I figured I could leverage the sgfToXy( ) method and use that to draw the star points.

In the future this will make it easy to add a multi-dimensional array indexed by the number of board lines which provides the appropriate star point pattern. So a 19 line board would be 'this.starPoints[19][ ]' and a 9 line board would be an array like 'this.starPoints[9][ ]'.


Thursday, January 12, 2012

Step 4 - The UML Code Design

Before going any further, I thought I'd perform a simple object analysis to discover the objects, methods and properties in the application.

A Quick & Dirty Object Analysis

I forget where I learned this, but this object decomposition technique has been a really helpful. First, I write a paragraph that describes what happens in the application in just plain English. Next I read over the paragraph and bold the nouns and underline the verbs. The nouns become the classes and the verbs are the methods (and a lot of adjectives in the paragraph will end up as properties).

So, for this application, the description would be pretty straight-forward:
The player selects a game from one of several categories. The board is displayed with a Next and Previous button underneath it. The player clicks next and a stone is displayed on the board with a label (e.g. a number or shape) and may be highlighted. The player can click previous and the last stone will be removed from the board. After the stones are displayed the SGF game file will be interpreted. Comments are displayed if there are any in the SGF game file for that move. The player can either dismiss a comment or click Next to see the next comment.
So separating out the nouns (classes) and verbs (methods) this quick & dirty object analysis provides the following:

Nouns
player
game ( SGF game file )
category
stone
comment
board

Verbs
select {game}
draw {stone}
remove {stone}
select {stone}
interpret {comment}
display {comment}
dismiss {comment}
click_next {player? game? I'm not too sure right now what this should apply to...}
click_previous {player? game? I'm not too sure right now what this should apply to...}

UML Diagram
So taking these, it's easy to build a rough UML diagram:


Thursday, January 5, 2012

Step 3 - Prototype testing with jQuery Mobile

I thought I would create a prototype to usability test the design. I'll use jQuery mobile since it's such a fantastic UI framework! You just need to know some basic HTML to make a mockup pretty quickly.

Some of the things I love about jQuery Mobile are:
  • It can load everything as a single page. The app screens are represented by divs in the HTML which makes them "virtual pages". So instead of loading lots of tiny little pages, jQuery mobile can load one big page and shuffle around the divs when users change screens (which reduces response times considerably).
  • It is über-cross-browser -- all the pain and agony in making a mobile app work across multiple browsers is baked into the jQuery Mobile goodness. How do they do it? I have no idea. ( I also don't know how my Subaru's fuel injection system works, but as long as it keeps working I'm happy :-)
  • It is very simple. Creating a prototype is just as easy as marking up some template html they provide. 
If this was a more complicated design, I might start out with paper-and-pencil prototypes. However, since this is just three screens I'll try it with a jQuery Mobile prototype first and see how that goes.

The Prototype

The jQuery Mobile site provides some boilerplate for a single web page with multiple virtual pages.  They identify each screen using the HTML5 'data-' attribute. So for every screen I just need to create a div and set the 'data-role' attribute to 'page'.

The First ( Branches ) Selection Page

The first virtual page I create is the selection tab page. The code for it looks like this:

<!-- Start of first selection page (branches) -->
<div data-role="page" id="selectTabs">

 <div data-role="header">
  <h1>Game Types</h1>
 </div><!-- /header -->

 <div data-role="content"> 
  <ul data-role="listview" data-theme="g">
   <li><a href="#selectGames">Beginner ( 30 - 15 kyu )</a></li>
   <li><a href="#selectGames">Intermediate ( 15 - 1 kyu )</a></li>
   <li><a href="#selectGames">Expert ( 1 - 9 dan )</a></li>
   <li><a href="#selectGames">High Handicap</a></li>
  </ul> 
 </div><!-- /content -->

 <div data-role="footer">
  <h4>Page Footer</h4>
 </div><!-- /footer -->
</div><!-- /page -->

One cool thing here is that the selection list is created with just an <ul> unordered list with its data-role set to 'listview'. Also, note the href is set to '#selectGames' to link to the second virtual page where users select the game they want to view.

The page comes out looking like this (on an iPod Touch):


The Second ( Leaf ) Selection Page

The next page for this prototype is the list page where users select the game they want to follow:

<!-- Start of second selection page (leaves) -->
<div data-role="page" id="selectGames">

 <div data-role="header">
  <h1>Games</h1>
 </div><!-- /header -->

 <div data-role="content"> 
  <ul data-role="listview" data-theme="g">
   <li><a href="#main">Fred (29k) vs Wilma (15k)</a></li>
   <li><a href="#main">Fred (29k) vs Barney (15k)</a></li>
   <li><a href="#main">Fred (29k) vs Pebbles (15k)</a></li>
   <li><a href="#main">Fred (29k) vs Bam Bam (15k)</a></li>
  </ul> 
 </div><!-- /content -->

 <div data-role="footer">
  
 </div><!-- /footer -->
</div><!-- /page -->

Note the id of this virtual page is "selectGames" which is where the #selectGames href from the previous screen is pointing to. For the prototype testing I have put some fake games for the user to select. Whatever they select will take them back to the main page.

This looks like this (on a Color Nook tablet):


The Main Page

The main screen is slightly more complicated:

<!-- Start of the main page -->
<div data-role="page" id="main">

 <div data-role="header" class="ui-grid-b">
  <div class="ui-block-a">
   <a href="#" data-icon="arrow-l" class="ui-btn-left ui-btn ui-btn-icon-left ui-btn-corner-all ui-shadow ui-btn-up-a" data-theme="a">
    <span class="ui-btn-inner ui-btn-corner-all" aria-hidden="true">
     <span class="ui-btn-text">Back</span>
     <span class="ui-icon ui-icon-arrow-l ui-icon-shadow"></span>
    </span>
   </a>
  </div>
  <div class="ui-block-b"><h3>Go Game Reader</h3></div>
  
  <div class="ui-block-c">
   <a href="#" data-icon="arrow-r" class="ui-btn-right ui-btn ui-btn-icon-right ui-btn-corner-all ui-shadow ui-btn-up-a" data-theme="a">
    <span class="ui-btn-inner ui-btn-corner-all" aria-hidden="true">
     <span class="ui-btn-text">Variation</span>
     <span class="ui-icon ui-icon-arrow-r ui-icon-shadow"></span>
    </span>
   </a>
  </div>
 </div><!-- /header -->

 <a href="#selectTabs" data-icon="arrow-r" class="ui-btn-right ui-btn ui-btn-icon-right ui-btn-corner-all ui-shadow ui-btn-up-a" data-theme="c">
  <span class="ui-btn-inner ui-btn-corner-all" aria-hidden="true">
   <span class="ui-btn-text">Otakee ( 6 Dan ) challenges The Master ( 9 Dan )</span>
   <span class="ui-icon ui-icon-arrow-r ui-icon-shadow"></span>
  </span>
 </a>

 <div data-role="content"> 
  <canvas width="400" height="400" id="goBoard">
   <p>This example requires a browser that supports the
   <a href="http://www.w3.org/html/wg/html5/">HTML5</a> 
    &lt;canvas&gt; feature.</p>
  </canvas>
  
 <div class="ui-grid-a">
  <div class="ui-block-a"><button onClick="">Previous</button></div>
  <div class="ui-block-b"><button onClick="drawNextMove()">Next</button></div>
 </div><!-- /grid-a --> 
  
 </div><!-- /content -->

 <div data-role="footer">
 
 </div><!-- /footer -->
</div><!-- /page -->

Notice the first part of the page description has three areas for the Back button, title and Variation button. The class name of  "ui-grid-b" on the header div is used to specify a container with three sections. The contents of each grid cell are in ui-block-a, ui-block-b and ui-block-c.

The next section is the game selection button. It's basically just a link button to the first selection page.

Underneath this is the canvas where the board is drawn.

And the final important part of the UI are the Next and Previous buttons. These are in a container with the class="ui-grid-a"tag. This divides the container into two columns.

And then there's the footer again, which we aren't doing anything with yet.

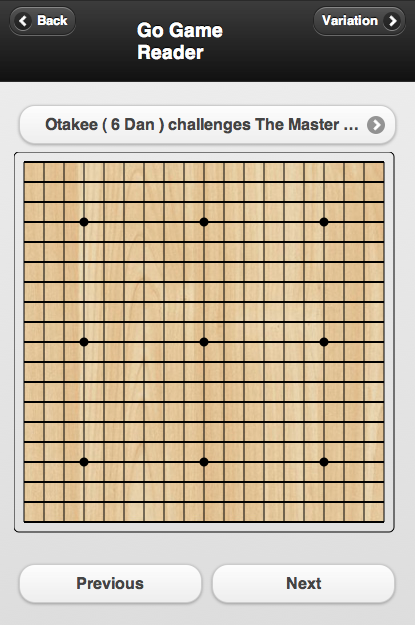
All together it looks like (on the desktop version of Safari):


I used three different browsers to make the screen captures. They range from an ancient iPod Touch all the way up to the latest desktop version of Safari on OS X. It's interesting what a good job jQuery does across this big range of devices.

Sunday, January 1, 2012

Step 2 - Something Closer to the Right Design

Yeah... I was right... The day after I drew out the wrong design I woke up and realized exactly how it was wrong :-(

Some of the problems obvious to me now are:
  1. The design is not suited to a typical smartphone screen. The board takes up most of the real-estate and either the controls or comments will be below the fold.
  2. Referencing the stones with numbers is not smart. The numbers should really only represent the number of the move. People have probably been documenting Go games in print for a hundred years or so. So why am I trying to re-invent that wheel?
  3. What was I thinking when I put in a select menu to pick a game :-(  Earlier I mentioned the offline storage could take hundreds of games! A select menu is definitely the wrong design pattern to use... A better pattern would be something like the one Apple uses for selecting a photo or downloading a podcast.
  4. The design would look odd on an iPad or other tablet... Also there's the portrait / landscape orientations to consider...
So here is take 2:

To address the first two problems, a redesign of the main screen:

The main features here are:
  • Overlaying the comments on the Go board itself to save screen real-estate
  • The only numbers displayed on the stones will be black and white's last plays
  • If a stone needs to be referenced, but it doesn't have a number already, a triangle will be displayed
  • Having a separate button to see a game variation instead of scrolling down to see it
  • Changing the drop down to a set of selection screens instead
Speaking of the selections screens... here's what I was thinking of:

The selection screens would use a similar design pattern to Apple's iPod Touch / iPhone for gathering photos in separate folders/tabs:


And once the user clicks on a folder/tab they would see individual games to select:


As far as problem 4... that's a tough one... Something like this might be good:


In landscape mode, the board would be (nearly) as large as it possibly could be, and then in the free space to the right the controls, comments, and any variation would appear. If I moved the title and sub-title to the right, then that would maximize the board size to its limit.

I just started reading this really great book Head First Mobile Web and it's talking about Responsive Web Design. I think that will really help out with problem 4. So I guess for right now I'll just keep this idea in my head and I'll see how/if the responsive web design will help out later down the road...


Friday, December 23, 2011

Step 1 - Creating the 'Wrong Design' for an HTML5 App

I'm impressed how well JavaScript supports Object Oriented Programming! I'm really starting to understand how HTML5 and JavaScript have the potential to make an awesome generation of mobile apps!

As long as I'm taking the time to learn how to create HTML5 apps, I was thinking I should aim at creating one I could put on my iPod Touch or Color Nook to review Go games.

For me, the easiest way to start a UI design is to throw away my first idea. No matter what I'm initially thinking of, it's wrong in any of a number of ways. I find drawing it out and throwing it away as quickly as possible helps me come up with a better design, faster.

So here goes:

Requirements:
  • HTML5 App that works on different platforms
  • Will play back stored Go game files
  • Uses local storage -- so will work offline
  • Supports the SGF Go game format
  • Supports UTF-8 characters

Because it's one of the few situations where I'm one of the target users, defining my audience and user stories should be pretty easy. ( As I talk to users, I can expand and improve this... )

Users:
  • Beginning Go players who want to view commented Go games 

User stories:
  • As a <beginning Go player> I want to <select a commented Go game to view> so I can <view it on my mobile device>.
  • As a <beginning Go player> I want to <view a commented Go game > so I can <read the expert comments and eventually win more games>.

The wrong design:

What I'm visualizing ( which I'm sure will be completely wrong ) looks something like this:


BTW - I drew this wireframe using the website hotgloo.com . It was really awesome! I'd never tried it before, but it was pretty close to walk-up-and-use usability for their site!

Wednesday, December 21, 2011

My First JavaScript Object...

I thought I'd learn a little more about JavaScript's Object-Oriented programming model by adding in a game object to display player moves to the board from my last post. I've never been a fan of JavaScript in the past, but since it's listed on GitHub as the most popular programming language, it seems like a good idea to become more familiar with it. So here goes!

I started by creating a game object that would store a game record and would return each individual move. Since SGF is, by far, the most common record for storing Go games I wanted to make my object compatible with this format. My JS object looked like this:


// The Game Object has the metadata about the game, the moves, and a method to access the moves
function Game( name, moves )
{
 this.name = name;
 this.moves = moves;
 this.currMove = 0;
 
 // getNextMove() gets the current move and then increments the counter to point to the next move
 this.getNextMove = function()
 {
  var nextMove = this.moves[this.currMove];
  this.currMove++;
  return nextMove;
 }

}

One thing to note is that the header for the SGF record contains a LOT  more metadata about the game. It contains information like the player's names, their level, the komi, etc. So if I pursue this in the future, I would change this object to contain all of this information.

Next, I used the following code to create an instance of this object. This is the record for an example game record with 17 moves:

var theGame = new Game("Test Game", [";B[pd]",
          ";W[dd]",
          ";B[pg]",
          ";W[qo]",
          ";B[cg]",
          ";W[fg]",
          ";B[pl]",
          ";W[co]",
          ";B[eg]",
          ";W[ep]",
          ";B[fp]",
          ";W[gp]",
          ";B[dg]",
          ";W[er]",
          ";B[dp]",
          ";W[dr]",
          ";B[gg]"]);

Since the method getNextMove( ) returns the sgf-format for each move, in order to use this on the game board, I wrote a function to convert the sgf format to the real screen coordinates:

// sgfToXy() converts this sgf format to a canvas x,y coordinate
function sgfToXy(theMove)
{
 // get the unicode value for the character 
 virtual_x = theMove.charCodeAt(3);
 virtual_y = theMove.charCodeAt(4);
 
 // subtract out 97 to transform the unicode number to the board position
 // NOTE: it would be nice if JavaScript had constants :-(
 virtual_x = virtual_x - 97;
 virtual_y = virtual_y - 97;
 
 // transform the virtual board value into a real screen coordinate
 real_x = 10 + virtual_x * 20;
 real_y = 10 + virtual_y * 20;
 
 // return an array with the points
 var theResult = {
   x: real_x,
   y: real_y
 }
 return theResult;

}

Now I can draw the game pieces with the canvas  x,y screen point provided by sgfToXy. I can also get the piece color from the B or W character in the move:

//draws the move (in sgf format) on the game board
function drawPiece(theMove)
{
 // first convert the move into an actual location to draw the piece
 var theConvertedValue = sgfToXy(theMove);
 
 // figure out the color of the piece
 if(theMove.charAt(1)== "B")
 {
  theColor = "black";
 } else
 {
  theColor = "white";
 }
 
 // use jCanvas to draw the piece
 $("canvas").drawArc({
    fillStyle: theColor,
    strokeWidth: 1,
    x: theConvertedValue.x, y: theConvertedValue.y,
    radius: 10
  });
}

In order to see the moves on the board, I created a button with a small onClick event handler. Here's the HTML I added to go.html:

<button onclick="drawNextMove()">Next Move</button>

And here's the actual event handler:

function drawNextMove()
{
 var theMove = theGame.getNextMove();
 drawPiece(theMove);
}

So at the end of this, what I have is a simple board and a button:


Looking over the code at this point, it's apparent the board should also be its own object as well. In the next post I'll tidy up the board code so it's its own object. I'll also make some other changes so it will be re-sizable, etc.

Following that, I wanted to experiment with using HTML5's offline storage. With 5 MB of storage and the average Go game taking up about 10K, it should be possible to store around 500 commented games!

Saturday, December 17, 2011

Drawing a Game Board with jCanvas and HTML5

I had been learning recently about the HTML5 Canvas and its JavasScript API's. It was a lot of fun playing around with it, but the API's were pretty low-level. So I was really happy when I found a great jQuery plugin that supported the canvas tag - jCanvas !

I thought I'd share what I learned about jCanvas by giving an example of how I learned to use it in drawing out a Go game board.

Step 1 - Create the Canvas

This file go.html is just plain-vanilla HTML5 markup to provide the canvas to draw on.

<!doctype html>
<head>
     <meta charset="utf-8" />

 <script src="jquery.min.js"></script>
 <script src="jcanvas.min.js"></script>
 <script src="go.js"></script>

        <title>HTML5 Go Board</title>
</head>
<body>
 <canvas width="400" height="400" id="goBoard">
  <p>This example requires a browser that supports the
  HTML5 canvas.</p>
 </canvas>
</body>

Step 2 - Draw the Board Background

The file go.js has the code for drawing the game board on the canvas. The first step was to give the board a wood-grain background. This jCanvas code selects the canvas tag, and then draws the image "board.jpg" at the point (10,10) on the canvas.

One interesting part here is that since it takes a while to load the image, and I want the image to be drawn first, I use the load property to set a callback. Essentially what this is doing is saying "Go ahead and draw this image, and when you're done call the function drawBoardLines( )".

When I left this out initially, the image kept showing up on top of everything else because all of the other operations would complete before the image loaded :-(

 // load the image first 
 $("canvas").drawImage({
   source: "board.jpg",
   x: 10, y: 10,
   width: 360,
     height: 360,
          fromCenter: false,
          load: drawBoardLines //after image is loaded draw the lines on top
 });

Step 3 - Draw the Edge


The next part is just a simple border for the game board. You can either use strokeStyle to create just a rectangular outline or fillStyle for a filled shape. I thought it was cool that the canvas supports rounded corners so I took advantage of the cornerRadius property to round them off a bit.

// draw the border
 $("canvas").drawRect({
   strokeStyle: "#000",
   x: 0, y: 0,
   width: 380,
   height: 380,
   fromCenter: false,
   cornerRadius: 5
 });

Step 4 - Draw the Lines


The next part was drawing the actual board lines. The Go board is a simple grid of 19 x 19 lines. jCanvas made it super easy to draw the lines by just specifying the beginning and ending points of each line inside two loops.

 // draw horizontal lines
 for(i=0; i<19; i++)
 {
  var px1 = 10;
  var px2 = 370;
  var py1 = (i * 20) + 10;

  $("canvas").drawLine({
    strokeStyle: "#000",
    strokeWidth: 2,
    x1: px1, y1: py1,
    x2: px2, y2: py1
  });
 }

 // draw vertical lines
 for(i=0; i<19; i++)
 {
  var px1 = (i * 20) + 10;
  var py1 = 10;
  var py2 = 370;

  $("canvas").drawLine({
    strokeStyle: "#000",
    strokeWidth: 1,
    x1: px1, y1: py1,
    x2: px1, y2: py2
  });
 }

Step 5 - Draw the Star Points


One unusual feature about the go board is a set of 9 points it uses for handicapping. These are tiny black circles called star points. Interestingly, the HTML5 canvas forces you to draw a 360 degree arc if you want a circle. The nice thing about jCanvas's drawArc is that it defaults to 360 degrees which makes drawing circles simple.


 // draw starpoints
 for(i=0; i<3; i++)
 {
  var px = (i*120) + 70;

  for(j=0; j<3; j++)
  {
   
   var py = (j*120) + 70;

   $("canvas").drawArc({
     strokeStyle: "#000",
     strokeWidth: 5,
     x: px, y: py,
     radius: 2
   });
  }
 }


Step 6 - Putting it All Together


When I put all of the JavaScript code together it looked like this:
// wait until the page is loaded to draw the board
$(document).ready(function()
{
 drawBoard();
});

// this function just draws the background
function drawBoard()
{
 // load the image first 
 $("canvas").drawImage({
   source: "board.jpg",
   x: 10, y: 10,
   width: 360,
     height: 360,
          fromCenter: false,
          load: drawBoardLines //after image loads, this callback draws the lines on top
 });
}

// this function draws the lines on top of the board image
function drawBoardLines()
{
 // draw the border
 $("canvas").drawRect({
   strokeStyle: "#000",
   x: 0, y: 0,
   width: 380,
   height: 380,
   fromCenter: false,
   cornerRadius: 5
 });

 // draw horizontal lines
 for(i=0; i<19; i++)
 {
  var px1 = 10;
  var px2 = 370;
  var py1 = (i * 20) + 10;

  $("canvas").drawLine({
    strokeStyle: "#000",
    strokeWidth: 2,
    x1: px1, y1: py1,
    x2: px2, y2: py1
  });
 }

 // draw vertical lines
 for(i=0; i<19; i++)
 {
  var px1 = (i * 20) + 10;
  var py1 = 10;
  var py2 = 370;

  $("canvas").drawLine({
    strokeStyle: "#000",
    strokeWidth: 1,
    x1: px1, y1: py1,
    x2: px1, y2: py2
  });
 }

 // draw starpoints
 for(i=0; i<3; i++)
 {
  var px = (i*120) + 70;

  for(j=0; j<3; j++)
  {
   
   var py = (j*120) + 70;

   $("canvas").drawArc({
     strokeStyle: "#000",
     strokeWidth: 5,
     x: px, y: py,
     radius: 2
   });
  }
 }
}

I named the file go.js and I put it in the same directory as go.html from Step 1. Next I downloaded jQuery and jCanvas and added those libraries to the directory. And finally, I created an image for the board, and put that in the same directory, too.


Then once I loaded go.html into my browser I saw: